


-
Posts
89 -
Joined
-
Last visited
Andy Q's Achievements
")


-
Hi All, Membership is now requires. Please get money to Ste before the 15th Oct. Otherwide you cannot attande regia events and witll be removed form the forum and FB pages.
-
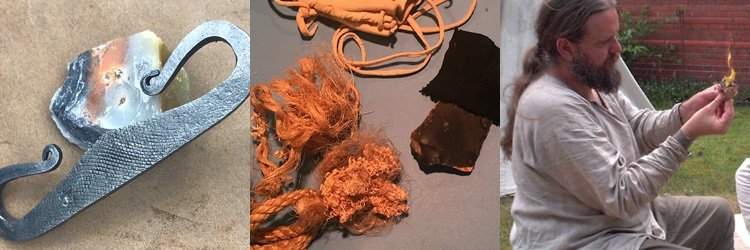
(With both of these methods there can be an element of pain if done wrong so please use gloves when handling) Use clippers to obtain lengths of Nettle or bramble. Cut as close to the bottom of the stem as possible Nettles – Use a gloved hand to draw the nettle through your closed fingers to remove the stinging hairs and leaves. Once you have gone one way you can then go the other. Continue till the hairs are removed. Bramble - Use a gloved hand to draw the bramble through your closed fingers to remove the stinging thorns and leaves. This make take slightly more pressure than the nettles so use thick gardening gloves. Once you have gone one way you can then go the other. Once the main thorns are removed use a blunt scraper to remove at more of the thorn stems from the stem. Be careful you do not dig too deeply into the stem as the fibres you need are just under the surface. Pulping For both types of material you now have to pulp the centre of the stem. There are various ways to do this. Some people like to put the Nettles on a stone floor and walk on them . Others like to gently tap the stem with a wooden hammer or round stone. For brambles I use a wooden mallet on a stone. Make sure the whole length is pulped. You can also flex the stem gently to make sure all of the length of stem is pulped. Fibre removal The fibres can now be removed from the nettle in strips. The same goes for the bramble. Normally the centre pith is removed and not used but for the bramble it can be kept and used as a very rough cordage for not essential binding of objects. Both fibres should be hung on a nail to dry. Processing Both sets of fibres will still contain slightly woody sections. You can place the fibers between your hand and gentle rub them together. The wood elements will begin to crumble and fall off. The more you do this the more the larger fibres with start to break down into thinner and thinner fibres. The thinnest being one strand in thickness can be used in sewing. I usually take the final fibers and grade them into different thicknesses depending upon the width. Weaving Take a strand of the fibres and offset its length so you have to strands with the loop in the middle. Make sure one side is slightly longer than the other. This allows for a stronger joint when you will add more fibres later. I tend to find it is better to slightly moisten the strands which weaving to stop breakage. Squeezing your middle section gently twist one fibre until it kinks and forms a loop on itself. You will now have a loop. And two strands. Take the loop in one hand (I am right handed so I hold the loop in my left hand). Take the fibre furthest away from you and twist it away from you with your thumb and finger. You are then going to change the positions of the two fibres by take this fibre and the one behind it and twisting your wrist back and up toward yourself so the twisted fiber goes up and other the other fibre. The untwisted one goes underneath the twisted on and to the front position. Move your left hand down so you pinch the new twist to stop it unravelling. Now take the new clean fibre and repeat the process. Grab the fibre between thumb and for finger. Twist it forward and then take both fibres and swop their positions again. The newly twisted one coming up and over the one you twisted first and that one going underneath the other. Move you left hand down to pinch the new twist and begin the process again. Adding fibres New fibres can be added To the twists when needed. I like to add when I have four cm left on a strand. I fold a new fibre near the end and hold them against the existing fibres. Then as I make the next twist I twist the new fibre onto the old one. This can make a slightly thicker section but usually your fibre is thinning out at this point so two thinning ends can be added together to make the normal width required. You then carry on like this till you get the length you want. To end the cordage I tend to wet and add a small knot just to hole it in place. These become microscropti and do not interfere with sewing if used in that way. Youtube examples Sally Pointer – Preparing bramble fibers. https://www.youtube.com/watch?v=3SJdWjSEN6g Making Bramble cordage https://www.youtube.com/watch?v=yllZBqAOek8
-
-
 Andy Q changed their profile photo
 -
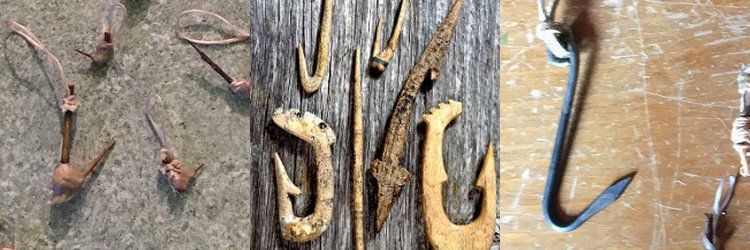
Fishing Hooks Left to Right, Cheap to more expensive Hawthorn, Bone, 10th C and Metal
-
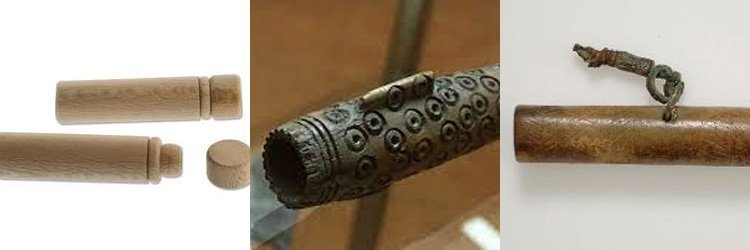
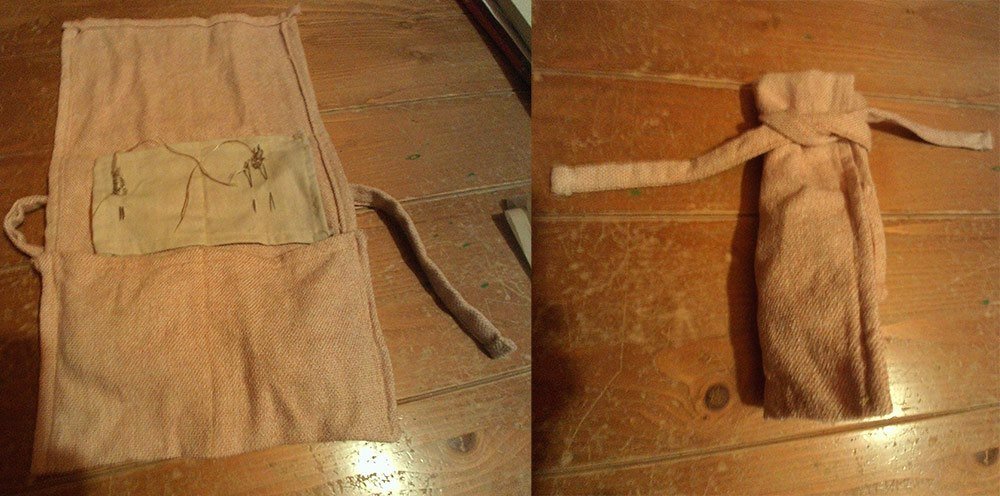
Needles Cases Left to Right, Left to Right, Cheap to more expensive Wood, Fish-shaped antler needle case, 10th C and Brass You may have a needle tube all of which require skill to craft, or of simplicity make a wrap from a piece of spare material.
-
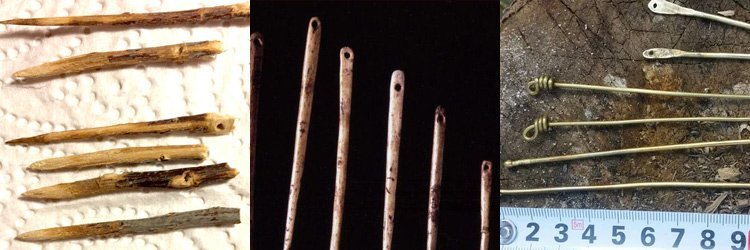
Needles Left to Right, Cheap to more expensive Hawthorn, Bone and Horn, Metal
-
Bit rambling sorry :).... Its one of those questions you think about when first starting out. How much kit do I take for a day on the Wic. After you have started off in the group we like everyone to think about a craft that they might like to undertake and demonstrate on the wic. Some will entail more preparation, equipment and or setup than others but that is ok and we (as the older WSF members) have all been in the same situation before. Try and see what people do and what you might be interested in learning. You don't have to have one activity. Most members have a series of activities they have learnt so they can changes to something else every so often for a change. Some activities can be showed to the public and they are allowed to touch and feel. (The miden display for example) or the different coloured wools that Dave produces. Others like the carving displays utilise sharp tools which can never be given to the public. Shown by the user by all means during a talk about their tools but not handed over. Some activities like fire-lighting are always good to start with. A flint and steel are fairly cheap to obtains and then all you need it something to catch fire, We tend to use char cloth a lot because it catches a spark quickly and helps with quick combustion of material. Now in reality there is no evidence of char cloth from out period. (The earliest mention being 17th century) but it can be used for demo purposes telling people with have no evidence but also showing other material that would be around at the time, (thistle for example). If your like Ste, or me and Jake you usually have a secret stash of fire material to be used all day. Have a small demo of kit to show what you might travel with and then have a days supply of combustible material behind you somewhere. Lets face it as soon as someone sees you lighting fire. You'll be asked to do it again and again.... Kids and adults with fire....... So make sure you have extra material. We use the same sort of method with the fishing display. Small nets made to allow people to hold them and see their construction. Huge nets to hand behind. We make a lot of natural hawthorn fishing hook as every event you will lose one or two to the rigours of demonstrations so making a 'job lot' of them whilst you are in the mood should give you enough to last all year. Again think about your persona, do you want to just show everyday kit that you might use in your everyday life or do you want something like a metal hook as well that will allow you to show a more expensive way of catching fish. We joke its the Jarls fishing hook as they would have taken time of the smith to make the wire and fashion it into a hook. With any activity you want to do please feel free to discuss it with the AO's to see if it is suitable for use on the Wic. Above all enjoy yourselves and have fun.
-
Well done Deb!😀
-
Version 1.0.0
1 download
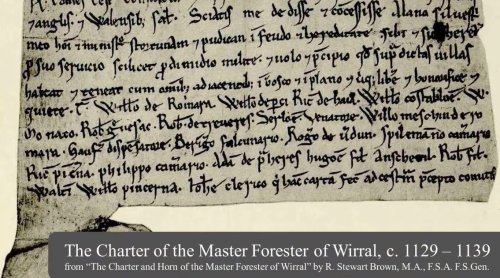
The Charter of Master Foresters of the Wirral. c 1129-1139 -
Examples of the weave types used in the group. Plain (Tabby) weave is our standard weave for all our basic clothing for workers.. Its what we should be wearing on the Wic. (Unless we are playing a more posh character but there will only ever be one or two in posh weaves on the Wic. This is played in turn by those with the correct kit and accessories for the part.) Herringbone weave is for posh kit. It is not kit we should be wearing on the Wic. (Think of it as party wear for our feasts and special occasions or events where we need to demonstrate posh kit). It uses more material than plain weave. The Diamond weave is posher than the heringbone and uses more material in the weave. Again is is not for everyday use on the Wic.
-
Check with Dave or Jacob but, To go on the field in a regia event you will need a BFS in the weapon you wish to use but these can be done at training sessions where 3 groups are meeting and a Regia training officer or deputy present. They will also do them at event like Jorvik if they know beforehand. (usually in the morning before regia training in the morning of the event.
-
Morons in Chelsea Tractors don't know how to park.... (Reoad blocked once again)
-
One for Ele and St maybe. We did ours unside out and folded in so when turned and finished the seam is inside out of the way.
-
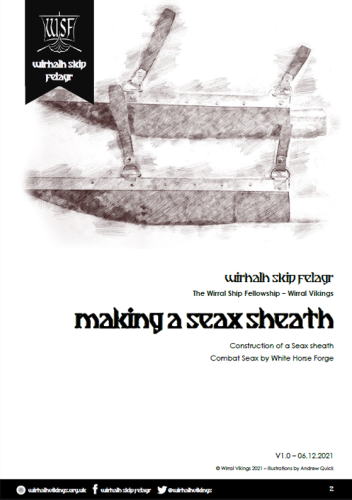
View File Making a Seax Sheath Guide to making a Seax sheath for a combat safe seax by Tony Tanner of White Horse Forge. Submitter Andy Q Submitted 06/12/21 Category Authenticity - weapons
-
Version 1.0.1
5 downloads
Guide to making a Seax sheath for a combat safe seax by Tony Tanner of White Horse Forge.
until